How to Deactivate Facebook Messenger
There comes a time when you just have to leave Facebook to remain sane and you eventually deactivate Facebook in hope that you would be away from all the inanities of social media. However, Facebook being deceptive as always, doesn’t deactivate Facebook Messenger after deactivating the Facebook account. You have to go one step further and deactivate the Messenger separately. So here we are with a simple guide to deactivate Facebook Messenger completely so that you can finally attain nirvana.
Deactivate Facebook Messenger
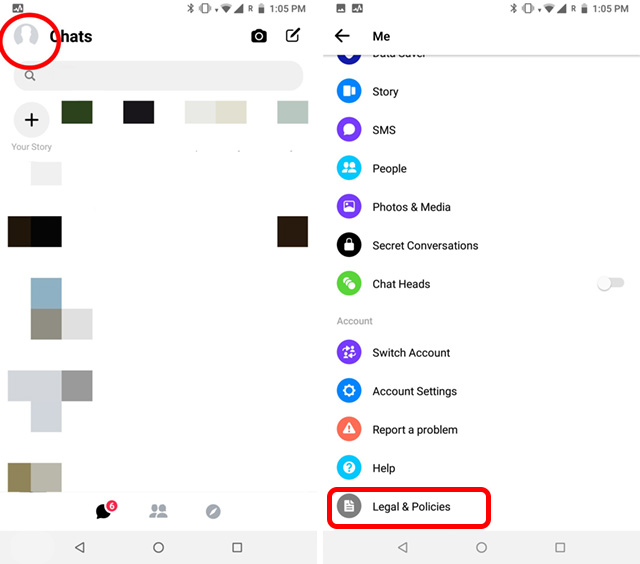
- First of all, make sure you have deactivated your Facebook account either from the app or the website. Next, open the Facebook Messenger app and tap on your profile picture on the top-left side. Now scroll down and open Legal and Policies section. Of all the places, Facebook chose to put Deactivation option under Legal and Policies section. Good job with you deceptive tactics, Facebook. Nonetheless moving to the next step.
- On the bottom, you will see the Deactivate Messenger option. Tap on it and then it will ask for a confirmation. Finally, tap the Deactivate button and you are done. Facebook Messenger will be deactivated instantly and won’t activate unless you log in to your Facebook or Messenger account.
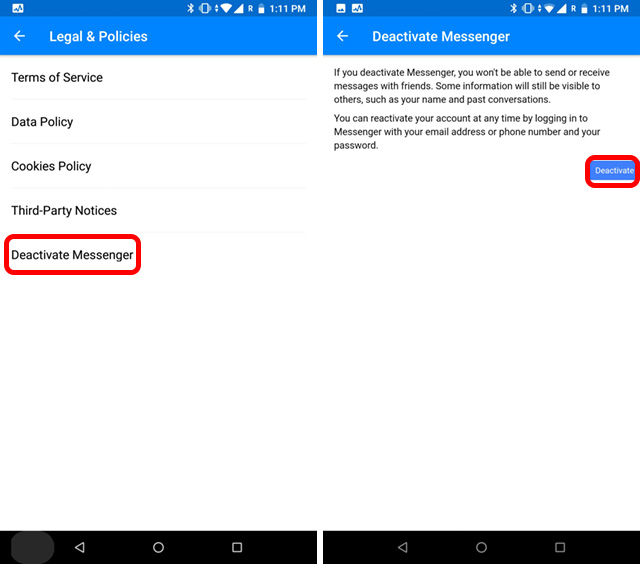
Keep in mind that deactivating Messenger doesn’t delete your messages, it just makes your account invisible to other users and you won’t be able to send or receive messages. In case you want to get back to Messenger, you can log in later and use it like nothing happened.
Also, after deactivation, if you decide to log in back to Messenger only, your Facebook Account will be activated too. Yes, Facebook works in mysterious ways and we gotta deal with it.
Note: If you want to completely delete your Facebook account with Messenger and everything related to Facebook, you can go through our complete guide on how to delete your Facebook account. But after this, there is no turning back.
Limit Your Facebook Messenger Usage
If the reason you’re thinking of deactivating messenger is simply because you just find yourself spending too much time on the app, there are some other options you can consider as well. There’s Screen Time on iOS, and Digital Wellbeing on a bunch of Android phones that you can use to limit your time using Messenger. So, here’s how you can use those features to control your Messenger usage.
Digital Wellbeing on Android
Google released Digital Wellbeing in 2018 which comes as part of Android Pie. You can use many of its features to limit your time on smartphone and set timers for individual apps. After you have used an app for a certain amount of time, it will block the app including its notifications too. This feature is set to bring a better and healthy lifestyle to smartphone users, and in this case, blocking Facebook Messenger may bring a positive outcome for you.
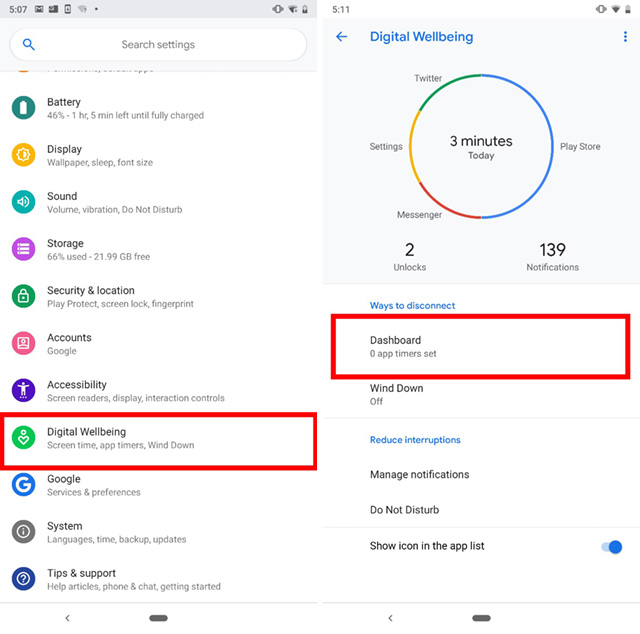
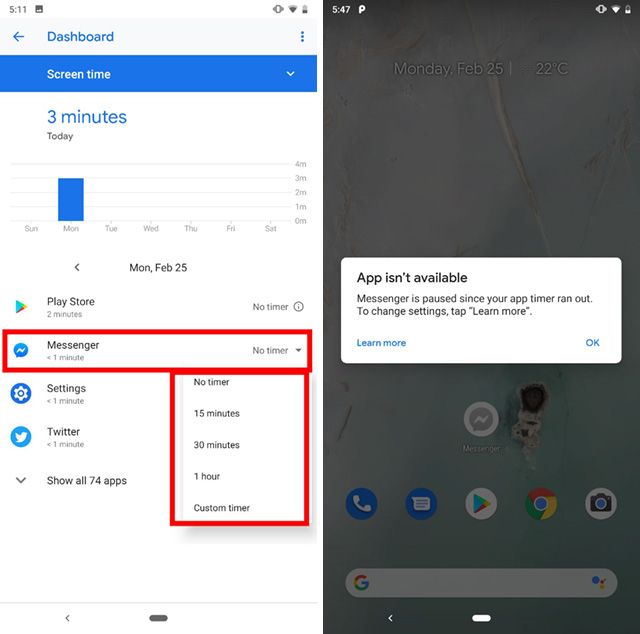
- To access Digital Wellbeing, open Settings, and scroll down to Digital Wellbeing. Open it and you will have the complete picture of your smartphone usage. Now, tap on Dashboard to get a list of apps on your smartphone.
- Here, look for Facebook Messenger and set timer by tapping on the right side. You can choose the pre-configured timer or create your own custom timer as well. After setting the timer, close the settings and you are done. Facebook Messenger will be blocked after you cross the time limit.
Stay Focused
While Digital Wellbeing is great, it works only on select Android Pie devices. To get a similar feature on older versions of Android you can use Stay Focused app. This app uses accessibility permission to block selected apps, so give the accessibility permission in the beginning.
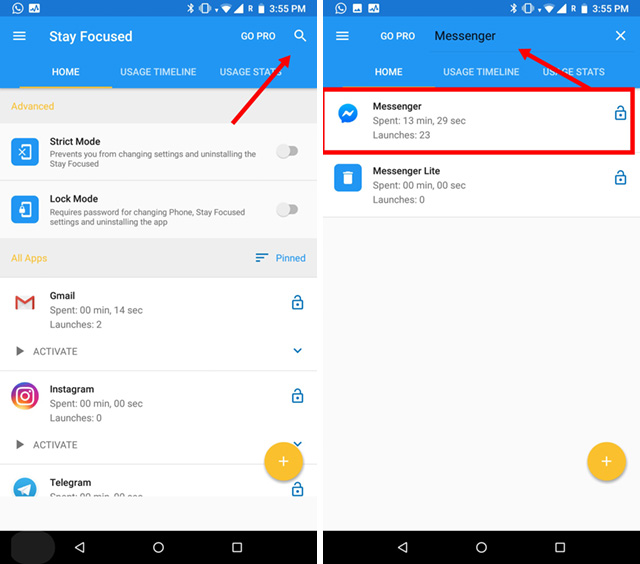
- First, search for the messenger app and open it. Before setting the timer, it will show an unlocked sign on the left side.
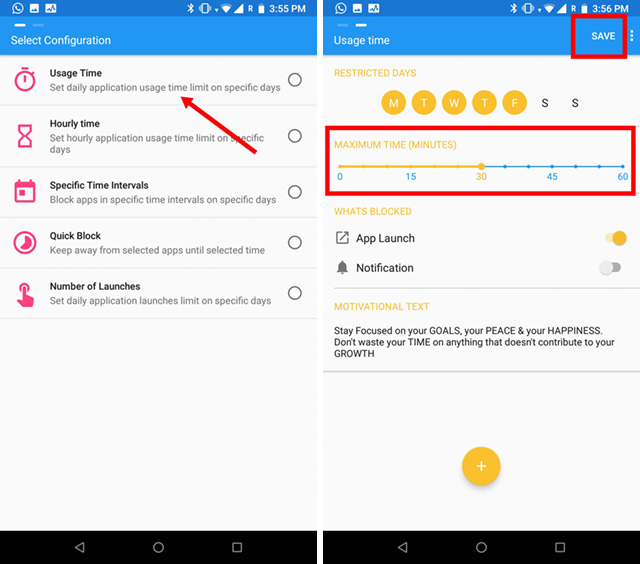
- After selecting the app, it will give you a couple of options including Usage Time. Select it and choose your preferred time on the next screen. After that, just tap on the Save button on the top right side and you are all set. The Messenger app will be blocked based on your usage time.
Screen Time on iOS
Similar to Digital Wellbeing, Apple introduced Screen Time with iOS 12. It’s a great feature to make your life much more disciplined and productive. Screen Time has a long list of features and you can further personalize it to your liking and need. If your iPhone or iPad is running iOS 12, this is how it will work.
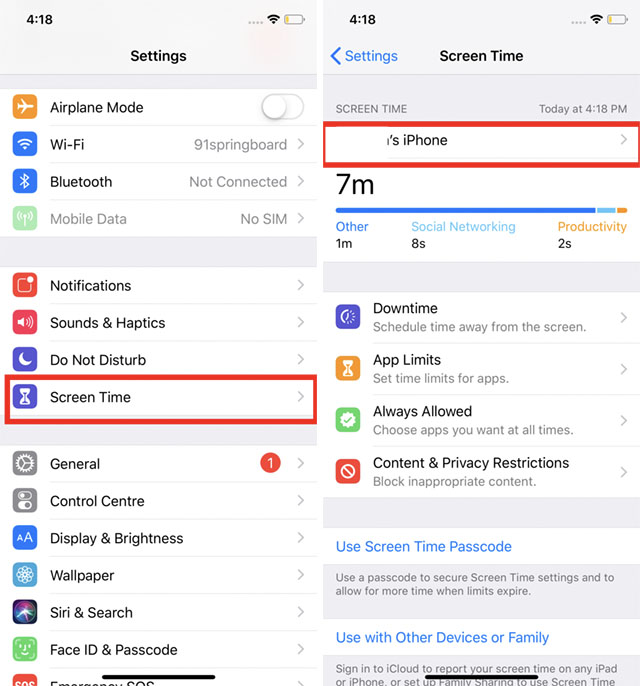
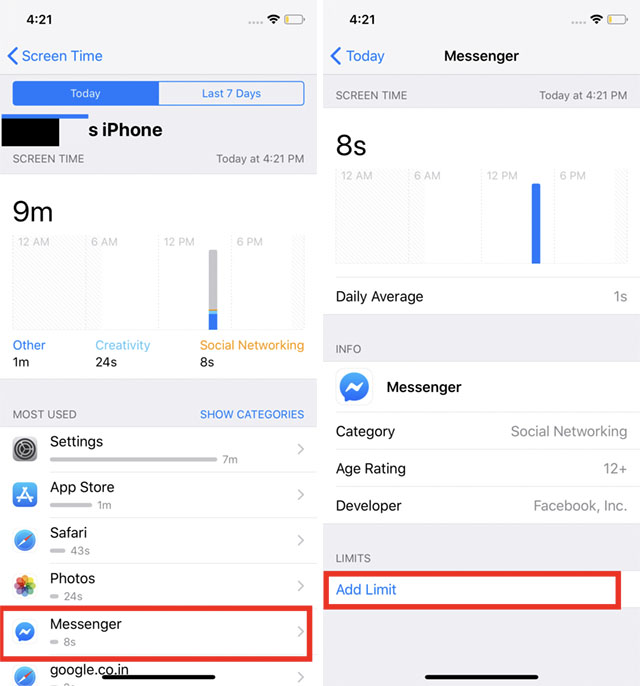
- Open Settings and tap on Screen Time. There, you will find a lot of options, just tap on the text that says ‘Your iPhone’ and proceed further.
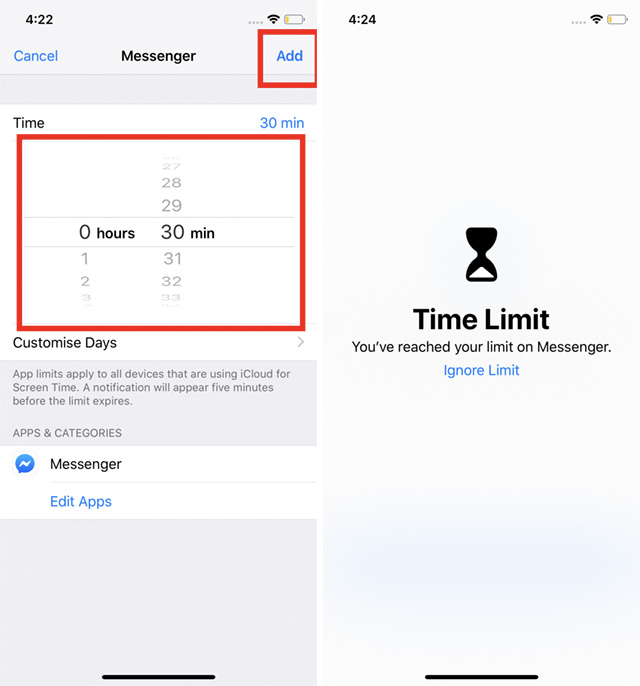
- Here, scroll down to the Messenger app and open it. Now, tap on Add limit at the bottom and assign the time limit.
- Finally, tap on Add button on the top-right side to save the changes. Now, the Messenger app will be blocked after you reach the time limit.
Deactivate or Manage Facebook Messenger As You Like
So here we are. Facebook Messenger is very personal to us as we have been using it on daily basis for far too long. However, if you want to just quit Messenger, you can do so by following the guide. It’s pretty straightforward. Alternatively, you can also use the above-mentioned features to limit your phone usage. This way you will be able to remain in contact with your close ones without sacrificing the app. In the end, it’s up to you how you want to manage Facebook Messenger. Also, if you face any problems, you can comment down below. We will surely try to answer your questions.
from Beebom https://ift.tt/2U6Fcb6
via IFTTT


No comments